
As an Amazon Associate we earn from qualifying purchases. See our affiliate disclosure.
[Get the best value car interior roof cleaner on Amazon today!]
Let's face it, cleaning the interior roof lining of your car is probably not high on your list of fun things to do. It's awkward, it's easy to damage the material, and sometimes it feels like you're just smearing the dirt around. But a clean headliner makes a huge difference in the overall feel of your car's interior. Luckily, with the right approach and a little patience, you can get your car's roof lining looking fresh and clean without causing any damage. This guide will walk you through the process step-by-step.
[Browse top-rated car interior roof cleaner on Amazon]
Step 1: Gather Your Supplies
Before you start, it's important to have the right tools and cleaning solutions on hand. Using the wrong products or techniques can easily damage the delicate fabric of your car's headliner. Here's what you'll need:
- Vacuum Cleaner with Brush Attachment: A vacuum is essential for removing loose dirt and debris. A soft brush attachment will prevent you from scratching or snagging the fabric.
- Microfiber Cloths: These are gentle and absorbent, perfect for wiping down the headliner. You'll want several clean cloths.
- Upholstery Cleaner: Choose a cleaner specifically designed for automotive upholstery. Test it on an inconspicuous area first to ensure it doesn't cause discoloration.
- Soft Bristle Brush: A soft brush can help loosen stubborn dirt and stains.
- Spray Bottle: For diluting the upholstery cleaner with water.
- Warm Water: For rinsing and diluting the cleaner.
- Optional: Steamer: A handheld steamer can be helpful for loosening dirt and stains, but use it with caution and keep it moving to avoid damaging the fabric.
[Browse top-rated car interior roof cleaner on Amazon]
Step 2: Vacuum the Headliner
This is the most important first step. Vacuum the entire headliner thoroughly with the brush attachment. Pay special attention to areas that tend to collect dust and dirt, such as around the edges, seams, and sun visors. Overlap your strokes to ensure you get every nook and cranny.
Why is vacuuming so important? It removes loose particles that could turn into a muddy mess when you apply the cleaner. Think of it like prepping a wall for painting – a smooth, clean surface is key.
[Browse top-rated car interior roof cleaner on Amazon]
Step 3: Prepare Your Cleaning Solution
Most automotive upholstery cleaners are concentrated and need to be diluted with water. Follow the manufacturer's instructions carefully. A general rule of thumb is to start with a diluted solution – you can always increase the concentration if needed.
Pour the diluted cleaning solution into your spray bottle.
[Browse top-rated car interior roof cleaner on Amazon]
Step 4: Test in an Inconspicuous Area
Before you start cleaning the entire headliner, it's crucial to test the cleaning solution in a hidden area. This will ensure that it doesn't cause any discoloration or damage to the fabric. Choose a small, out-of-the-way spot, such as near the edge of the headliner or behind a sun visor.
Spray a small amount of the cleaning solution onto the microfiber cloth and gently dab the test area. Wait a few minutes and then blot the area with a clean, dry microfiber cloth. Check for any signs of discoloration, damage, or loosening of the adhesive. If everything looks good, you can proceed to the next step.
[Browse top-rated car interior roof cleaner on Amazon]
Step 5: Gently Clean the Headliner
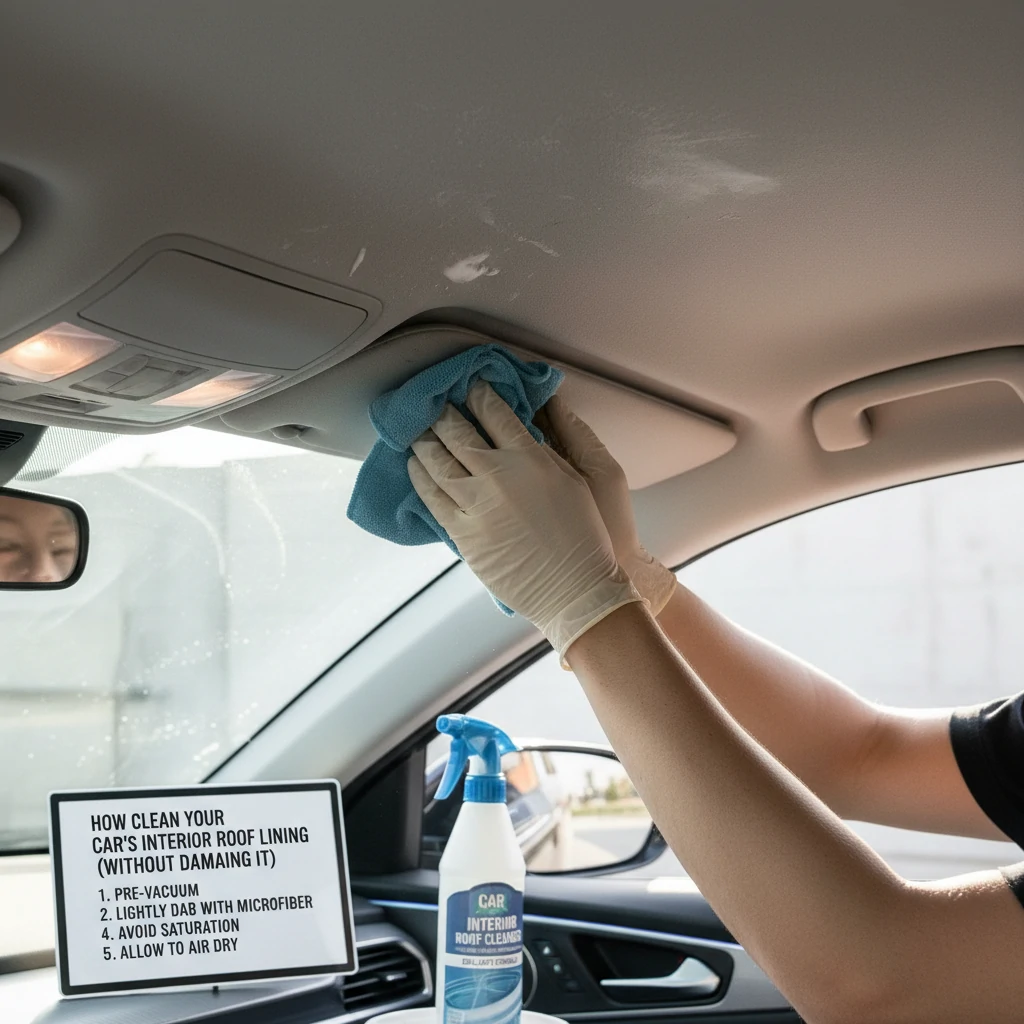
This is where patience and a light touch are key. Never spray the cleaning solution directly onto the headliner. Instead, spray a small amount onto a clean microfiber cloth. Gently dab the cloth onto the headliner, working in small sections. Avoid rubbing or scrubbing, as this can damage the fabric or loosen the adhesive.
Important Note: Work in sections of about one square foot at a time. This prevents the cleaning solution from drying on the headliner and leaving streaks.
Overlap your strokes slightly to ensure even coverage. If you encounter a stubborn stain, use a soft-bristle brush to gently loosen the dirt. Again, avoid excessive scrubbing.
[Browse top-rated car interior roof cleaner on Amazon]
Step 6: Blot and Dry
After cleaning each section, immediately blot it with a clean, dry microfiber cloth. This will remove excess cleaning solution and help to prevent water spots. Use a fresh cloth for each section to avoid spreading dirt.
Allow the headliner to air dry completely. Open the car doors and windows to improve ventilation. You can also use a fan to speed up the drying process. Avoid using a heat gun or hair dryer, as this can damage the fabric.
[Browse top-rated car interior roof cleaner on Amazon]
Step 7: Repeat as Needed
Depending on the condition of your headliner, you may need to repeat the cleaning process. If you still see stains or dirt, repeat steps 5 and 6. Be careful not to over-saturate the fabric, as this can loosen the adhesive.
[Browse top-rated car interior roof cleaner on Amazon]
Step 8: Final Vacuum
Once the headliner is completely dry, give it one final vacuum with the brush attachment. This will remove any remaining loose dirt or debris.
[Browse top-rated car interior roof cleaner on Amazon]
Tools for the Job: Choosing the Right Car Interior Roof Cleaner
While the method is important, the products you use are equally crucial. Using a harsh chemical or the wrong type of cleaner can lead to discoloration, fabric damage, or even detachment of the headliner. This is where choosing the right car interior roof cleaner becomes paramount.
One product that consistently receives high praise and is specifically designed for delicate automotive interiors is the Chemical Guys Lightning Fast Stain Extractor.
- Key Features:
- Gentle Formula: Designed to lift stains without damaging sensitive fabrics.
- Low Moisture: Minimizes the risk of over-saturation and adhesive damage.
- Effective on Various Stains: Handles everything from food spills to grease and grime.
Why do we recommend it? The low-moisture formula is a game-changer for headliners. It allows you to clean effectively without the worry of soaking the fabric and weakening the glue that holds it in place. Plus, its gentle yet effective cleaning power ensures that you're removing the dirt without removing the color or texture of your headliner.
Another great option is 303 Multi-Surface Cleaner.
- Key Features:
- Versatile: Safe for use on a variety of surfaces, including fabric, vinyl, and plastic.
- UV Protection: Helps to protect your headliner from fading and discoloration caused by the sun.
- Residue-Free: Leaves no sticky or greasy residue behind.
Why we recommend it: Its versatility is a major plus. You can use it not only on your headliner but also on other interior surfaces, making it a cost-effective and convenient option. The added UV protection is a bonus, helping to keep your car's interior looking newer for longer.
[Browse top-rated car interior roof cleaner on Amazon]
Pro-Tips / FAQ Section
- Avoid Over-Saturating the Fabric: This is the biggest mistake people make when cleaning their car's headliner. Over-saturation can loosen the adhesive and cause the fabric to sag.
- Work in a Well-Ventilated Area: This will help the headliner to dry quickly and prevent mold and mildew growth.
- Don't Use Harsh Chemicals: Avoid using bleach, ammonia, or other harsh chemicals, as these can damage the fabric.
- What if my headliner is sagging? If your headliner is already sagging, cleaning it may make the problem worse. In this case, it's best to consult a professional upholstery shop.
- How often should I clean my car's headliner? This depends on how often you use your car and how clean you keep it. A good rule of thumb is to clean it every 6 months to a year.
- Can I use a carpet cleaner on my car's headliner? No, carpet cleaners are often too harsh for delicate automotive upholstery. Stick to cleaners specifically designed for car interiors.
- What about spot cleaning? For small stains, you can try spot cleaning with a damp microfiber cloth and a small amount of upholstery cleaner. Be sure to blot the area dry immediately.
- Using a Steamer: If you choose to use a steamer, keep it moving and avoid holding it in one spot for too long. The heat can damage the adhesive. Keep the steamer nozzle several inches away from the headliner.
[Browse top-rated car interior roof cleaner on Amazon]
Encouraging Conclusion
Cleaning your car's interior roof lining might seem daunting, but with the right tools, techniques, and a little patience, you can achieve excellent results without damaging the delicate fabric. Remember to take your time, work in small sections, and avoid over-saturating the material. With this guide and a quality car interior roof cleaner like the Chemical Guys Lightning Fast Stain Extractor or 303 Multi-Surface Cleaner, you’ll have your car's interior looking and smelling fresh in no time. Now go ahead and give your car the clean it deserves! You got this!
[Check the latest prices and deals for car interior roof cleaner on Amazon today!]